These Easy Grilled Thai Chicken Skewers are packed with amazing flavors! Marinated with soy sauce, garlic, and a hint of lime, they’re super tasty and perfect for any barbecue.
Plus, they’re so quick to make! I love grilling these up for friends. Don’t forget to serve them with some peanut sauce for a yummy dip. Who can resist that? 🍗❤️
Key Ingredients & Substitutions
Chicken Thighs: I find boneless, skinless chicken thighs are perfect for skewers—they stay juicy and tender. If you’re looking for a healthier option, you can use chicken breasts, though they may dry out faster.
Soy Sauce: This adds key umami flavor. If you’re looking for a low-sodium version, feel free to substitute with low-sodium soy sauce or tamari for a gluten-free alternative.
Brown Sugar: This adds sweetness to balance the saltiness. You can replace it with honey or maple syrup if you want a different flavor profile. Just keep in mind that liquid sweeteners may affect the marinade texture.
Fish Sauce: Essential for that authentic Thai taste, but if you’re not a fan of the smell, you can swap it for soy sauce mixed with a dash of vinegar for a less intense flavor.
Coconut Milk: Great for the dipping sauce! If you prefer a lighter option, you can use low-fat coconut milk or even yogurt for a tangy twist.
How Can I Get Juicy Chicken on Skewers?
Achieving juicy chicken on skewers is all about marinating and cooking at the right temperature. Here’s how to ensure your skewers turn out perfect:
- Marinate the chicken for at least an hour for maximum flavor and tenderness. Longer is better!
- Preheat your grill to medium-high before adding the skewers. This helps sear the meat nicely.
- Cook on each side for just 4-5 minutes. Don’t overcrowd the grill, as that can cause uneven cooking.
- Let the skewers rest for a few minutes after grilling; this helps the juices redistribute for even more flavor!
With these tips, you’ll have perfectly grilled, juicy chicken skewers every time! Enjoy your cooking adventure!
Easy Grilled Thai Chicken Skewers
Ingredients You’ll Need:
Main Ingredients:
- 1 ½ pounds boneless, skinless chicken thighs, cut into bite-sized chunks
- 3 tablespoons soy sauce
- 2 tablespoons oyster sauce
- 2 tablespoons brown sugar or palm sugar
- 2 tablespoons fish sauce
- 1 tablespoon lime juice
- 3 cloves garlic, minced
- 1 tablespoon grated fresh ginger
- 1 tablespoon vegetable oil (optional, for grilling)
- Bamboo skewers, soaked in water for 30 minutes
- Fresh lettuce leaves, for serving
For the Dipping Sauce (optional):
- ¼ cup coconut milk
- 2 tablespoons Thai red curry paste
- 1 teaspoon fish sauce
- 1 teaspoon sugar
- A dash of lime juice
- Chili oil or chili flakes for drizzling
Time Needed:
This recipe takes about 20 minutes to prepare, plus at least 1 hour for marinating (3-4 hours for better flavor) and around 10-15 minutes for grilling. In total, you’ll need about 1 hour and 30 minutes, mostly waiting for the chicken to soak up all that delicious marinade!
Step-by-Step Instructions:
1. Make the Marinade:
In a large bowl, start by mixing together the soy sauce, oyster sauce, brown sugar, fish sauce, lime juice, minced garlic, and grated ginger. Stir well until the sugar is dissolved and the mixture is well combined. This will be your flavor-packed marinade.
2. Marinate the Chicken:
Add the bite-sized chicken chunks into the marinade and give them a good toss to ensure they’re all coated. Cover the bowl with plastic wrap or a lid and place it in the refrigerator. Let it marinate for at least 1 hour (or up to overnight for an extra burst of flavor!).
3. Prepare the Grill:
When you’re ready to grill, preheat your grill to medium-high heat. For best results, lightly oil the grill grates or brush the chicken pieces with some vegetable oil to help prevent sticking.
4. Assemble the Skewers:
Take your soaked bamboo skewers and thread the marinated chicken pieces onto each skewer, making sure to leave a little space between each piece to allow for even cooking. This should yield about 6 skewers.
5. Grill the Chicken:
Place the skewers on the grill and cook for about 4-5 minutes per side, turning occasionally. Your chicken should be cooked through and show nice char marks when done.
6. Make the Dipping Sauce:
While the chicken is grilling, you can prepare the dipping sauce. In a small saucepan, combine the coconut milk, Thai red curry paste, fish sauce, sugar, and lime juice. Heat gently over low heat until warm and fragrant, and give it a good stir. You can drizzle chili oil or add chili flakes to give it an extra kick!
7. Serve and Enjoy:
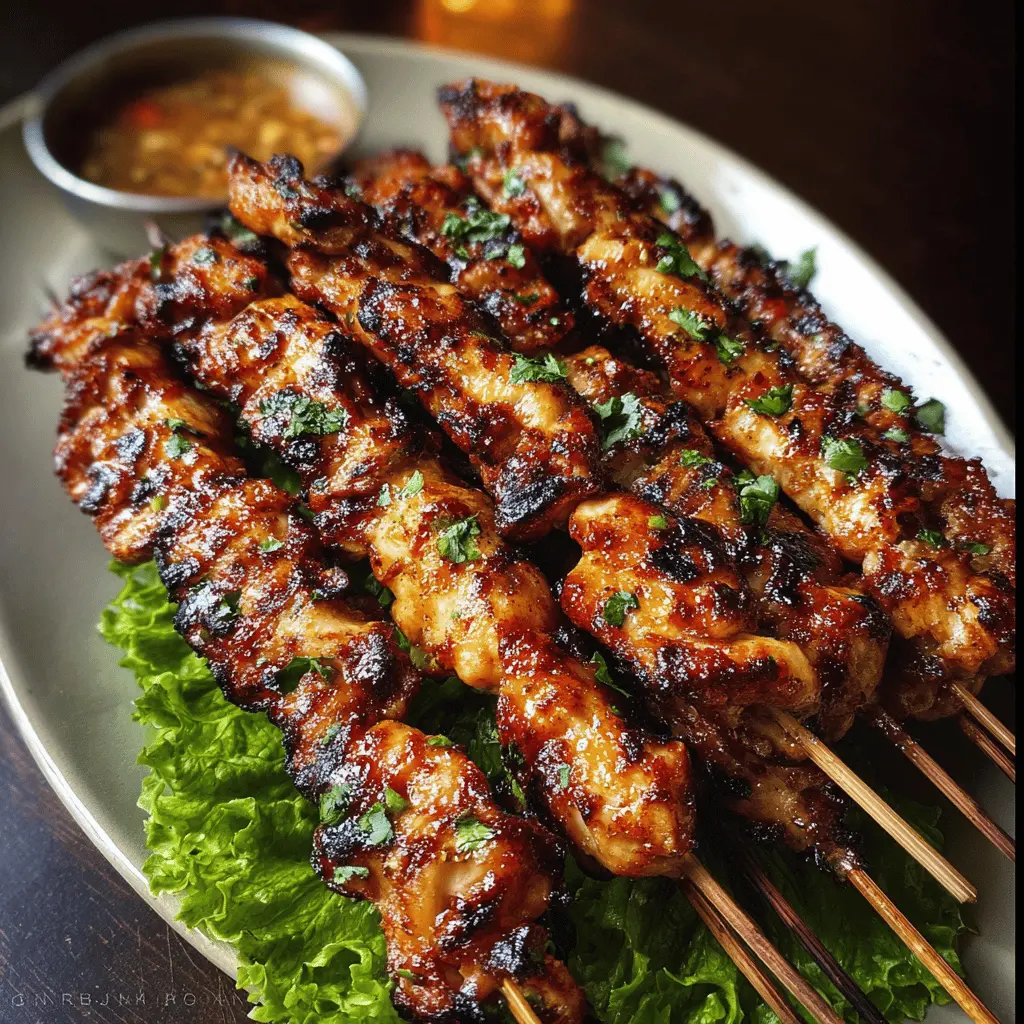
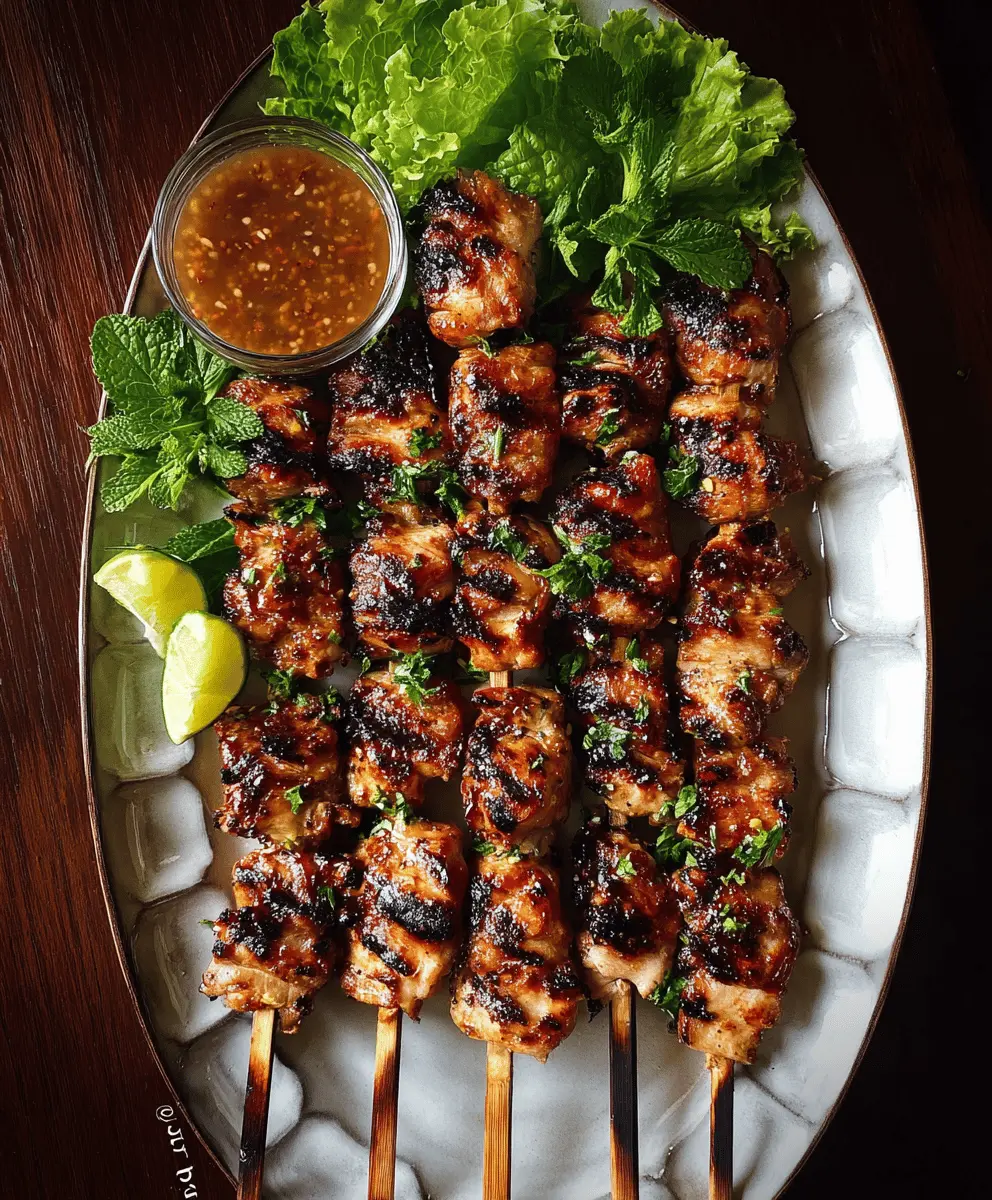
Once the chicken skewers are done grilling, arrange them on a platter lined with fresh lettuce leaves. Serve them hot with the warm dipping sauce on the side.
8. Time to Dig In!
Now you’re ready to enjoy your Easy Grilled Thai Chicken Skewers! Perfect for a weeknight meal or to impress your guests at a gathering. Bon appétit!
FAQ: Easy Grilled Thai Chicken Skewers
Can I Use Chicken Breasts Instead of Thighs?
Yes, you can use chicken breasts! Keep in mind they may dry out slightly faster, so be sure to monitor the cooking time closely. Aim for about 3-4 minutes per side if using chicken breasts.
How Can I Make This Recipe Gluten-Free?
To make these skewers gluten-free, swap the soy sauce with tamari, which is a gluten-free alternative. Additionally, check that your oyster sauce is gluten-free or find a suitable substitute.
What Other Vegetables Can I Add to the Skewers?
You can definitely add veggies! Bell peppers, zucchini, onions, or cherry tomatoes are great choices. Just keep in mind that they may require different cooking times, so cut them into similar sizes as the chicken for even cooking.
How Do I Store Leftovers?
Store any leftover skewers in an airtight container in the fridge for up to 3 days. To reheat, gently warm them on the grill or in a pan over low heat to avoid drying out the chicken.