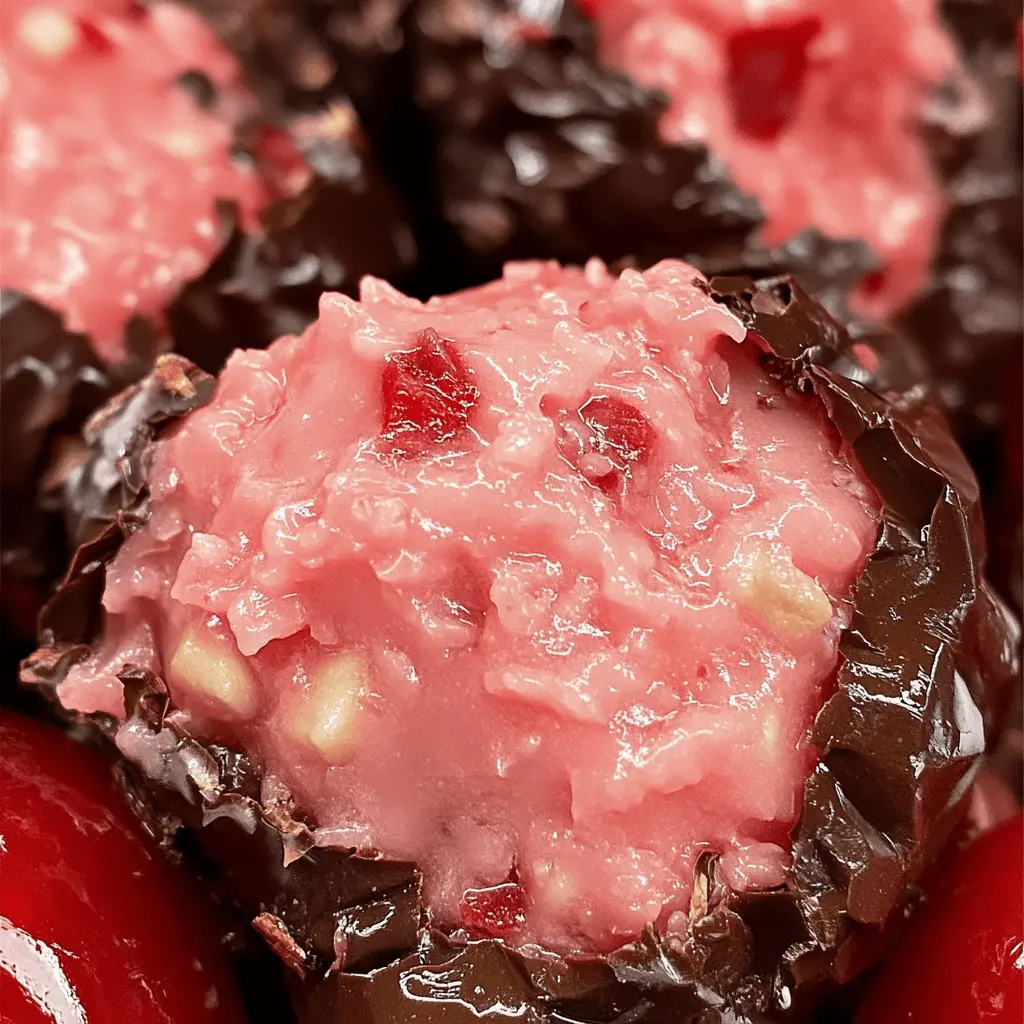
This Easy Homemade Cherry Mash Candy is a fun treat made with rich chocolate, creamy marshmallow, and bright chunks of cherry. It’s like a sweet hug in every bite!
Candy making might sound tricky, but this recipe is so simple. You mix, shape, and chill—no special skills needed! It’s perfect for sharing, or keeping all to yourself. 😊
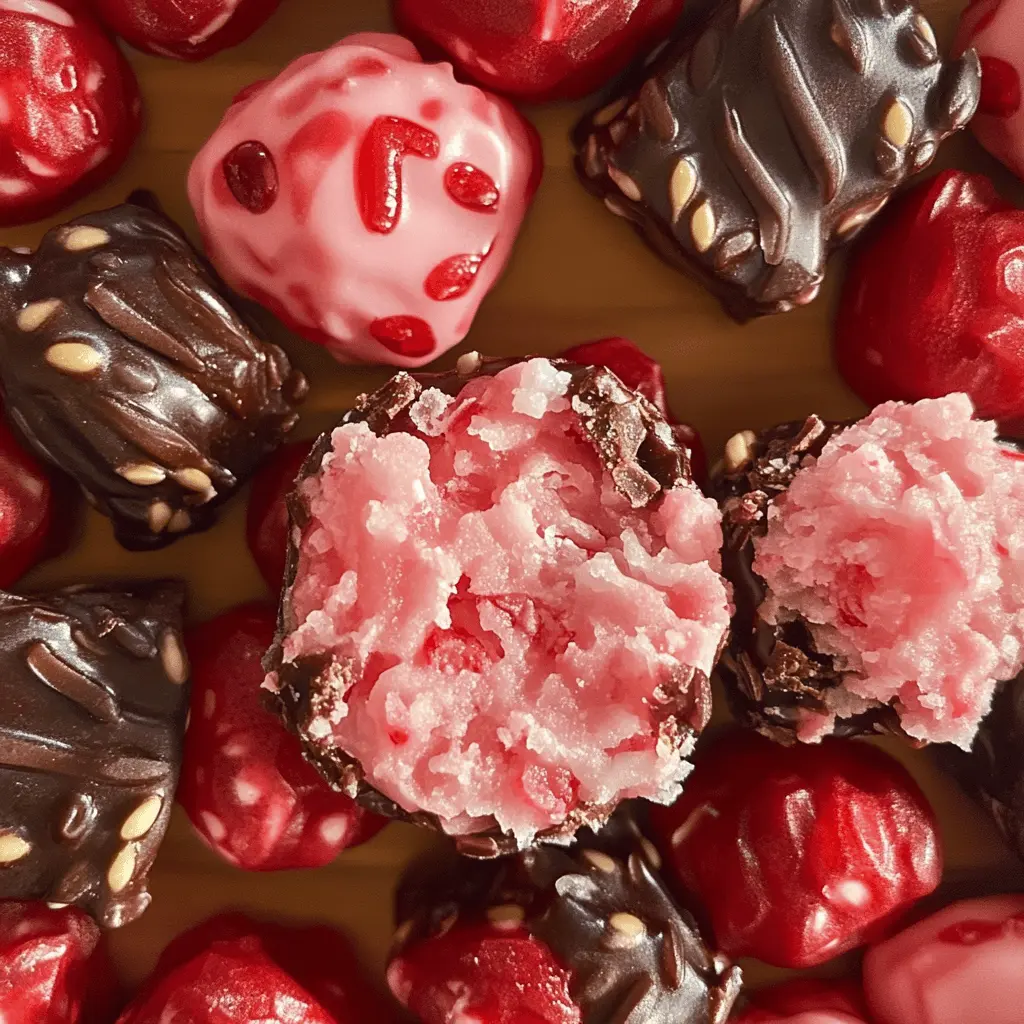
Key Ingredients & Substitutions
Mini Marshmallows: These add sweetness and fluffiness to the filling. If you’re looking for a change, you could try using regular marshmallows cut into smaller pieces. You might need to adjust the amount slightly.
Maraschino Cherries: Fresh cherries can be a great substitute if you prefer less sweetness. Just make sure to pit and chop them well. You could also use dried cherries for a more intense cherry flavor, but they’ll change the texture.
Milk Chocolate Chips: Use semi-sweet or dark chocolate chips for a richer taste. If you want a little fun, try white chocolate chips for a unique twist!
Baking Nuts: I love using peanuts for that classic candy feel, but feel free to swap in walnuts, pecans, or leave them off if you’re nut-free!
How Do I Get the Perfect Chocolate Coating?
Getting that smooth chocolate coating can be tricky, but here’s how to nail it! First, make sure your cherry marshmallow centers are well-frozen. This prevents them from melting into the chocolate.
- Melt the chocolate slowly. Use low power in the microwave, stirring every 30 seconds until smooth.
- Dip the chilled marshmallow center in the melted chocolate. A fork works well—let excess chocolate drip back into the bowl.
- Immediately roll or sprinkle nuts on the wet chocolate if using. Place on parchment paper to cool.
Also, don’t rush the chilling process! Allow the candies to set completely in the fridge for the best texture. Enjoy your candy-making adventure! 😊
Easy Homemade Cherry Mash Candy
Ingredients You’ll Need:
For the Filling:
- 2 cups mini marshmallows
- 1/4 cup butter
- 2 cups chopped maraschino cherries (drained and patted dry)
- 1 tsp vanilla extract
- Red food coloring (optional, for a more vibrant pink filling)
For the Coating:
- 10 oz milk chocolate chips or milk chocolate chunks
- 1 cup chopped peanuts or walnuts (optional, for coating)
How Much Time Will You Need?
This lovely Cherry Mash Candy recipe will take about 15 minutes to prepare and about 1 hour for chilling and setting. So, in total, you’re looking at around 1 hour and 15 minutes before you can enjoy these sweet treats!
Step-by-Step Instructions:
1. Melt the Marshmallows:
Start by grabbing a microwave-safe bowl. In this bowl, combine the butter and mini marshmallows. Pop it in the microwave and heat in 30-second intervals. Make sure to take it out and stir well each time until they are completely melted and smooth. It should look like a fluffy cloud!
2. Mix in the Cherries:
Next, stir in the chopped maraschino cherries and vanilla extract into the melted mixture. If you’re using food coloring for a brighter pink, now’s the time to add it! Give everything a good mix until it’s well combined.
3. Shape the Filling:
Let your cherry marshmallow mixture cool for a bit, then take small portions and shape them into logs or balls. Place these onto a parchment-lined baking sheet. Pop the sheet in the freezer for about 30 minutes until they firm up nicely.
4. Prepare the Chocolate Coating:
While the cherry filling is freezing, melt the milk chocolate chips. Again, use a microwave-safe bowl and heat in 30-second intervals, stirring until smooth and creamy.
5. Get the Nuts Ready (if using):
If you’re using nuts, place them in a shallow bowl so you can easily coat the candies later. You can skip this step if you prefer your candy without nuts!
6. Coat the Candies:
Once the cherry filling is firm, take each log or ball from the freezer and dip it into the melted chocolate, ensuring it is fully coated. While the chocolate is still wet, roll or sprinkle the candies in the chopped nuts for that delightful crunch!
7. Refrigerate to Set:
Place the coated candies back onto the parchment paper and refrigerate them for about 30 minutes or until the chocolate has fully set. Patience is key!
8. Store and Enjoy:
Once set, store your delicious Cherry Mash candies in an airtight container in the refrigerator. Grab one whenever you’re craving something sweet!
Enjoy the creamy cherry center surrounded by crunchy nuts and a delightful chocolate shell! Happy cooking!
Frequently Asked Questions
Can I Use Different Types of Cherries?
Absolutely! While maraschino cherries are the classic choice for their sweetness, you can use fresh or dried cherries for a different flavor profile. Just remember to chop them well if you go fresh!
How Do I Store Leftover Candy?
Store any leftover Cherry Mash candies in an airtight container in the refrigerator. They should stay fresh for up to a week. Just allow them to come to room temperature before eating for the best flavor!
Can I Make This Recipe Vegan?
Yes, you can! Substitute the butter with vegan butter and use dairy-free chocolate chips. Make sure to check the mini marshmallows for vegan options, as many contain gelatin.
What Happens if the Chocolate Coating Gets Too Thick?
If your chocolate starts to thicken while coating, simply reheat it gently in the microwave in short bursts. Stir well until it’s smooth again. Adding a teaspoon of coconut oil or shortening can also help keep it fluid!